Saturday, 9 June 2012

Tomatolets and Parsley Leaves

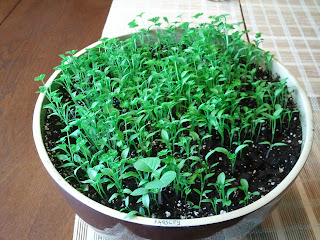
I noticed something amusing when I was watering ''the subjects'' last night--the Parsley is a really, really active seeker of sunlight. They look like they were windswept or squished, but they're just... 'active'.
This is what it looked like when I pulled it down and spun it around to get pictures.

...Yeah, probably going to wind up transplanting these guys soon. Don't worry, I'm going to post pictures when I do. ^.^

Other than that, I was doing some comparing of my Parsley to the 'Chinese Parsley' (Cilantro) and they are actually similar--the leaves at least, at this point in their growth.

Parsley
Chinese Parsley

You can sure tell that the Cilantro was transplanted recently--it's a very pale green compared to the vibrant chartreuse of the Parsley. Perhaps they are just naturally that color?

Want to see the 'tomatolets'? Scroll down really, really fast if you don't want to.


Everything is doing okay, and I am happy for it. 
...I'm going to wind up with a huge garden and a greenhouse as well one day, aren't I?

©reated by ŊetHerŊøte

Friday, 8 June 2012

Cutting the Cilantro Cluster

The transplanted tomatoes were moved outside today at six forty five in the evening. I must admit, it took some guts--they're doing so well that I am afraid that they will die. Seriously though, I have been babying them long enough.

This is them on the table inside just before their relocation, all standing up and doing really well. The little guys are doing okay as well, that tiny one unfortunately shriveled up into a puff of dust but the other two are growing.

 This is a top view of where they are now located, under the deck. Still gets lots of light, but it is sheltered from the worst of the wind thanks to the house and from the rain thanks to the deck.

And oh, does it rain! Behold the 'under cover tomato view' and the glistening, rain-splattered cement behind.

And so, with success in The Tomato Transplant

it is now time to return to...


PHASE II


Phase II Stage ii: Cutting the Cilantro Cluster ("CtCC")


First off, behold what I had to work with:
This was as much of a nightmare as it looks. In addition to being saturated, these have overcrowded each other due to my lack of action before this point. I was definitely 'hands off' if you know what I mean after their incident, especially with the watering--the soil was more like mud even today when I transplanted them even though I had been giving them far less water than the rest of my plants.

Behold the seed package:
 Complete with yet another name for the same herb. So let me get this straight--its nickname is Chinese Parsley, Cilantro = the leaves and Coriander = the seeds. Behold the 3 name herb.

This was the step just before me spending a very long time disentangling the leaves that resided on the right and grew on the left and vice versa. Sort of reminded me of trying to split seven different strings of Xmas lights from one evil, spun up ball.

This is the finished product, empty bowl in the center with my tangled green sprouts (still not watered at this point) situated in their four new homes.
In the interest of being sure that they would not suffer any extra shock, I gave them a light lukewarm watering and left it at that. 

I did work on untangling them some more after the photo below was taken, but I met limited success--I don't want to break or bend the stems any more than they already may be despite how careful I was.
Under the additional light and situated where they will get sun and not be overshadowed by their friends up on the windowsill, my little Cilantro clusters remained overnight. 

All of the above pictures were taken on 

June 7, 2012 from 6:43 - 7:45 pm.


This one, however, was taken this afternoon (12:17 pm on June 8, 2012) and it shows significant progress. I was afraid that I had lost most of these--but chances are at least one per pot is going to take. Behold, the day after Cutting the Cilantro Cluster:
They're trying, at least they are reaching to the light and not laying around. 
So once again,

Now, it's just wait and see...


©reated by ŊetHerŊøte

Wednesday, 6 June 2012

It's neat.


So I made this hummingbird feeder post--it was beautiful, all completed and marvelous--and then I failed to save it, and accidentally navigated away a day later because I figured I was being smart enough to save my work. That's neither here nor there now, because I redid it already. 'Tis here.

It occurs to me that this whole blogging thing (me in my obscurity with my obsessions) has brought me to the point where I do something that I enjoy (writing, doodling and taking pictures) while posting about the things I love on a webpage for all to see.

It's neat.


...Yep, that's it.


...What?
You want a picture in this post?

........................-searching-.............................


Check out my candle holder. 


©reated by ŊetHerŊøte

Tuesday, 5 June 2012

TTT: The Tomato Transplant

'Tis time--those tomato sprouts of mine are starting to get taller than six inches, and they are apparently to be transplanted anywhere in the range from 4-6 inches. In addition to them smelling like marvelous fresh red tomatoes when I water them, they have multiple leaves and are beginning to seriously overcrowd each other--not as bad as say my parsley or basil, but tomatoes are tall stalk style plants, not leafy herbs.

What has had me waiting so long? Something to do with the fact that not only has it been either pouring or cool outside (or both), the temperatures at night according to the forecast are set to reach a potential low of 3 degrees Celsius (37.4 Fahrenheit)--and that would more than likely kill all my seedlings. Seeing the fact that I have had all of those pots of compost soil waiting patiently outside for me since I began prep for Stage II of my seedling escapades (the transplanting) and the majority of my seedlings are in the window and I can free up space on the table--I have no reasons to stall anymore.

I was well aware that I was setting myself up for potential disaster by planting the entire contents of my seed packages in just one pot per plant type, but I must admit my confidence level in what I could grow was very low until everything began appearing before schedule (even if it was a bloody weed and not the oregano I thought it was) and since then I must say I am pretty proud of myself.

So, let's see how well I do when I begin


PHASE II


Phase II Stage i: The Tomato Transplant ("TTT")


First off, behold the tomato:
See? Crowded.

Next, behold what these are going to grow for me:
Seriously excited about grapevine style Super Sweet 100 Hybrid Tomatoes.

Anyway, the tomatoes are well-established (better than the cilantro even, these tomatoes have just gone through a crazy growth spurt in the last few days) as you can see:
...And clustered together. Not that I mind, it increases my chances of having at least one per pot survive (you know I'll be striving to save and keep them all alive).

Behold the pots that I had intended to transplant these into, along with the tall tomatoes:
And thus...

I began to emulate a mole and dig a hole in the center of these pots to make space for the seedlings.
Yes, that huge one is on a tray with a knob that is stuffed inside of a margarine container.
One does one's best.

What am I using for drainage trays under the rest of them?
Damn straight. Go green!

I started all of this at 6:03, and finished (all the planting and the first watering) at 7:35. Why did it take so long? Because I was being ridiculously careful, and had to be sure not to disentangle any of the seedlings that have literally grown together. Oh, and that picture above with four additional pots? I laugh at myself thinking that was going to be adequate, no matter how big captain pedestal is there. Wanting to stick with the whole idea of all of my tomatoes having drainage out the bottom of the pots (my other seedlings do not have this, just rocks in the bottom and me being very careful to never over-water, lest the roots rot), I used the two large ceramic ones with built in drainage trays that I have had kicking around my house for years. It's about time I used the damn things, they have moved with us twice if I recall. This is just another one of those times when it pays off to be a pack rat. Anyway!

Just a few more than expected. Seven in total--the red pot is empty, the ones on the windowsill are my other seedlings, the plastic container has spare compost dirt, the silver bowl I was using to scoop the spare dirt, and the plant in the far right and the far left on the back of the table are not tomatoes. (You don't say??)

 Tomato # 1
 Tomato # 2
 Tomato # 3
 Tomato # 4 (The big one!)
 Tomato # 5
 Tomato # 6
 Tomato # 7: The sprouts that I discovered as I was transplanting. Yes, I sure will be watching them to see if I need to go all Root Roust on them. Are there two? Nope--there are three.
Behold!
 Who knows if this little one will hang in there--but I will take care of it all the same until it takes off or shrivels away back in to the soil that it sprung from.
And the final 'behold': 
My 'transplantees'.

Now, it's just wait and see...


©reated by ŊetHerŊøte 

Monday, 4 June 2012

Operation Root Roust, Round II


Background//

`Authorization for termination of alien seedlings is no longer pending. Due to sufficient evidence (detailed here and here), it has been decided that the unwanted sprouts must be removed before they cause any negative effects to the subjects. The date has been set for May 28, 2012 for Operation Root Roust to be initialized. Please ensure completion on this date and provide proof of the sprouts removal.`


More infection spotted and noted. 

Authorization for removal still valid from previous op. 


Reopening Operation Root Roust... Done.


Clearance required to continue.


Authorizing... Done. Accessing details...


Re-Initializing op...

OPERATION ROOT ROUST II


Date: June 4, 2012. 
Start time: 15:15
End time: 15:30

Number of infected subjects: 2 (Parsley & Jalapeno)


Number of uninfected subjects: 5 (Hybrid Tomato, Oregano, Basil, Kung Pao, Cilantro)


Subject name: Parsley


Number of infected removed: 2


Subject name: Jalapeno


Number of infected removed: 1


All 3 alien sprouts verified removed and relocated to the compost pile. 
There is no longer a threat to the legitimate subjects. 


All subjects will continue to be monitored for further infection.


Op Root Roust II complete.


Returning to Operation Grow-A-Garden


©reated by ŊetHerŊøte 

Friday, 1 June 2012

Brace Yourselves... The Crafts Are Coming.

I love crafts because making something functional or fun from what seems like nothing makes me happy--that and I am a pack rat, so seeing things reanimated is really worth working for in my mind. On that note, here is the first of three crafts that I have tried my hand at lately.


...The Crafts Are Coming.

Project # 1: Decorate hummingbird feeders.


Using acrylic paint, I endeavored to make some glass bottle hummingbird feeders that I acquired more attractive to said little buzzing birdies. It's not as though they didn't work, they just were not bringing in the volume of aerial traffic that I wanted. ^.^ 


Initially, I painted the base of one bright red and left the glass bottle (which is a dark transparent green, not unlike old school pop bottles) unpainted. The second I left the base unpainted and added a few flowers on the glass bottle. This helped a little on both accounts, but still did not have the desired effect. 


Thus, I began to ponder. 


The flowers in this area that the hummingbirds feed from are mostly Honeysuckles and Lilacs, but I have seen them test out other flowers as well. With this in mind, I made full use of Tiger Orange, Rose Red, Royal PurplePetal Pink and Chartreuse. To add depth to these shades, I added some Bright Yellow, White, Pale Blue, Grey and Black.


After dismantling and painting the feeders, I wound up with these:


When I reassembled them, I used the base cover on the left with the bottle on the right and the base cover on the right with the bottle on the left. Confused? 


This is what they looked like right before I filled them and put them outside for the birdies to discover:


The best thing about this little project is that it worked, and continues to work and bring in hungry hummers for me to watch when I'm outside with my seedsSuccess, sugar syrup style!


©reated by ŊetHerŊøte                    

'Project Postings' instead of a 'Craft Corner'

In my current pondering, I have yet to decide what is worth making a whole new section for and what I should simply blog post about and perhaps link to and elaborate on later, if necessary.

Despite my indecision, I have been beginning to log a few of the crafts that I have dappled in lately--and the pictures are driving me crazy, I want them to be up here somewhere and not eyeballing me every time I update Grow-A-Garden

This may perhaps have a lot to do with the fact that I have created and wound up with more than one successful craft--three of late, to be exact. 


I really like the way these experiments turned out; and the more I look into the box of bottles and other bits of things that I was gifted, the more I wonder what else I can do with with the remaining contents.

What was in it originally?


  • Blue bottles (no lids), 
  • A Wire Butterfly, 
  • Bead Discs, 
  • Plates shaped like a Fat Fish 
  • and two baby jars (no lids)

Where did I get it from?
My mother acquired it from one of her friends, and wanted to know if I could... 
You know... 'do' something with it when we spoke of its existence over the phone. 
The next time I was over there, 
I checked out the contents for myself, 
and said that I wanted the box. 
My sibling was kind enough to bring it to me. 

So there it was, now in my house and therefore my problem. 
Every time I walked into the kitchen, this box was in a new spot in front of SOMETHING that I needed at the time. (Inevitable and infuriating.) And thus:

My mind: WTF am I going to do with these now?
My significant other (and I quote): "The hell is this doing here?"

Don't get me wrong--many of the things that came in the box I have already divined a use for--some of the blue bottles and all of the bead discs were used for two of my three recent crafts, but there are still remainders.
As you can well see, all that really remains is these bottles (originally from milk of magnesia, apparently) and that odd butterfly which has a ring on it--something tells me that is going to be hung outside sometime here soon. Not pictured here are the bottles I used, the bead discs, the plates shaped like a fish (two of them--now used for tuna bits and other snacks for my spoiled cat. Trust me you aren't missing much by not seeing them, although they are humorous o.0) and the two little jars, which I am going to use as candle containers for my zillions of tea lights that I have in case of special occasions (like a power outage), crayon melting and their low-light-when-lit value.

So instead of making yet another page that requires linking to, I have decided to just make this a not-so-elaborate-or-explained-to-the-'T' diary of sorts when I do crafts--a set of completed project postings more so than a craft corner, if you will. In the potential future that I get out of control and wind up doing a lot of it (*cough*SEEDS*cough*), then I will create a new page which I will then promptly bombard you with links for. ^.^


©reated by ŊetHerŊøte